Step-by-step procedure to install SQL Server 2012.
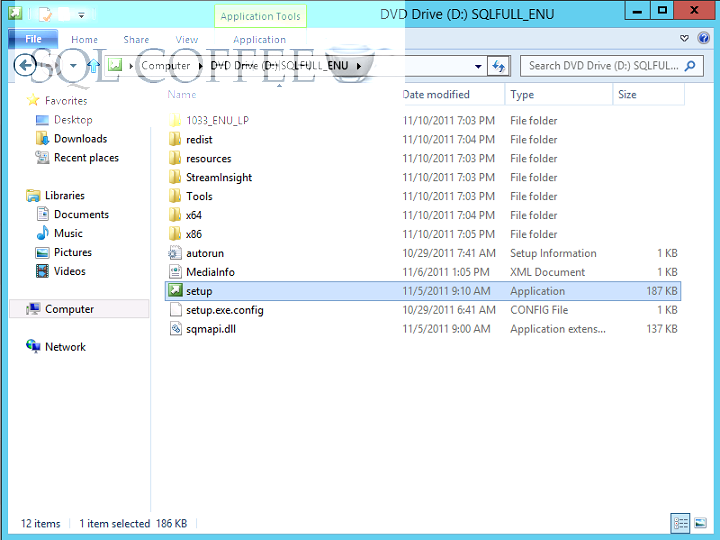
Run
SQL Server 2008 R2 setup.
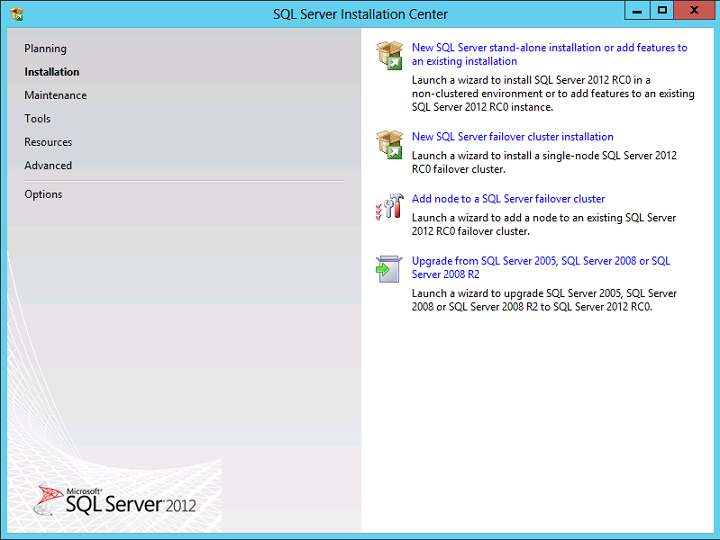
On the screen above, make a click on the "Installation" hyperlink in the left side
of the screen.
This screen shows the types of installation
available. Let's select the first type available "New SQL Server stand-alone
installation or add features to an existing installation".
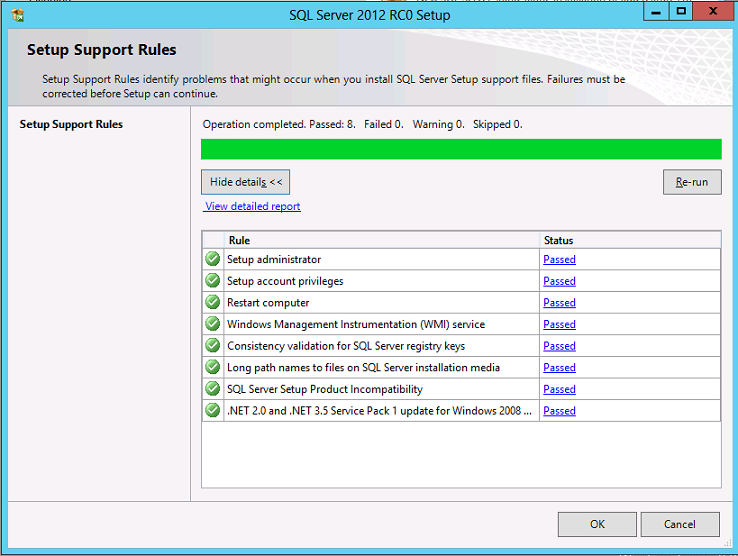
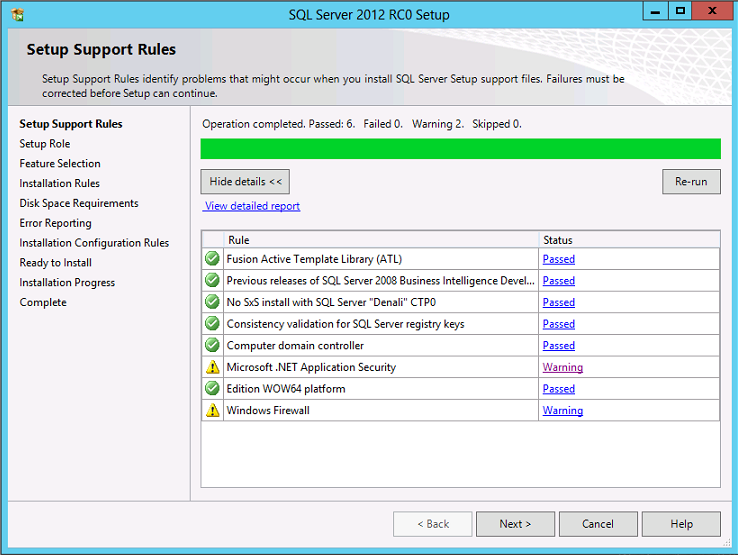
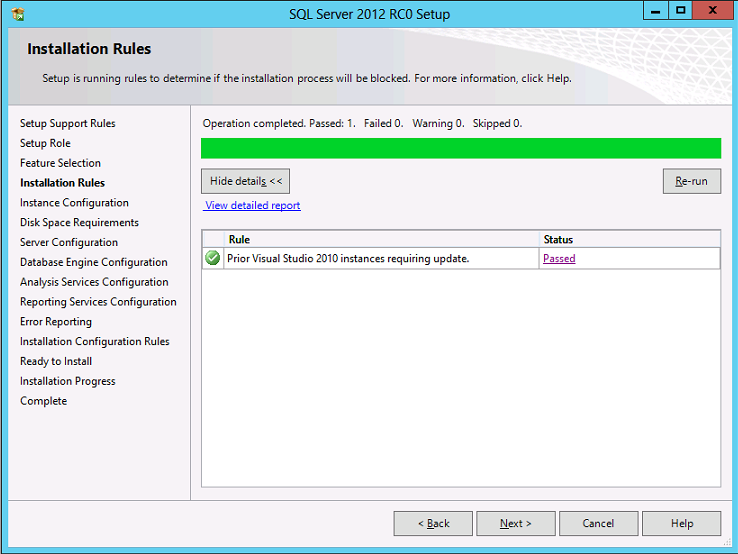
Above you will find the first set of Setup Support
Rules. The Next button is available only if all check results are successful, or
if failed checks do not block installation.
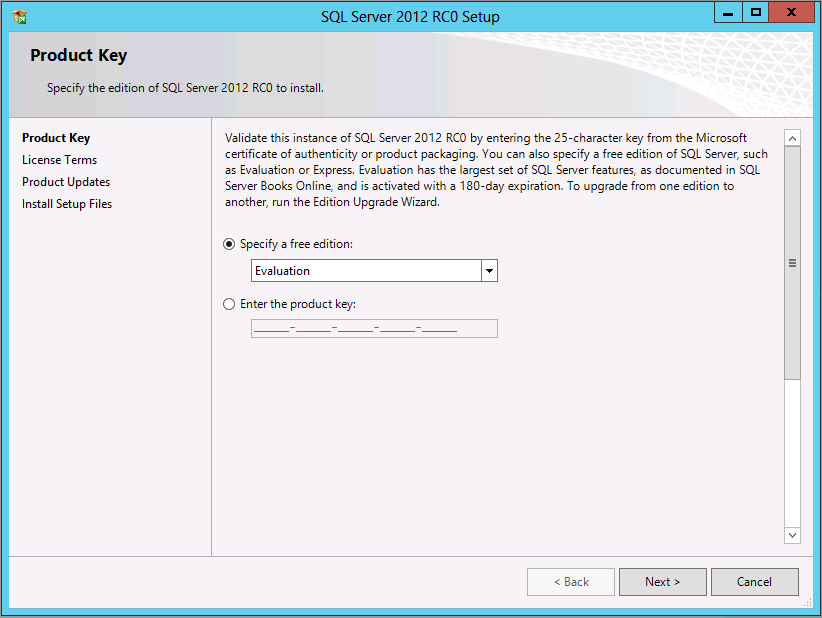
On
the page above, specify the edition of SQL Server to install. We chose the
Enterprise Evaluation Edition.
You should also provide a product key, if
required. Sometimes the product key is included in the media (product key is
pre-pidded.
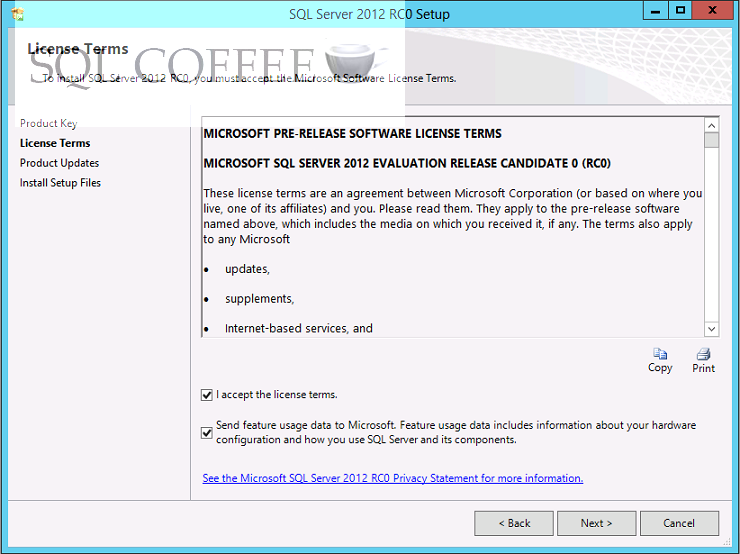
The above is the License Terms page. Read the
license agreement and if you agree with it, check the "I accept the license
terms" check box, and then click the Next button.
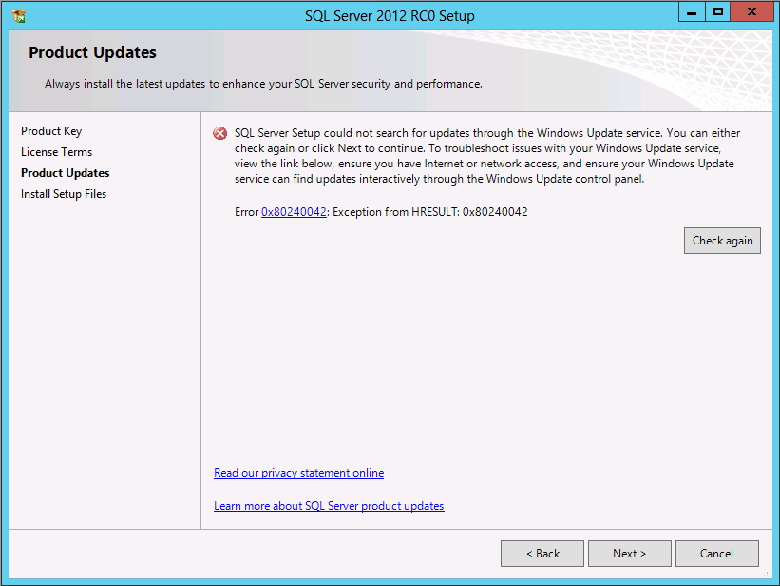
Access to the Internet is required, since SQL Server
setup will try to get updates for SQL Server during installation. If the
computer does not have access to the Internet and Windows Update service, then
you may get the above error message:
"SQL Server Setup could not search
for updates through the Windows Update service. You can either check again or
click Next to continue. To troubleshoot issues with your Windows Update service,
view the link below ensure you have Internet or network access, and ensure your
Windows Update service can find updates interactively through the Windows Update
control panel
Error 0x80240042: Exception from HRESULT:
0x80240042."
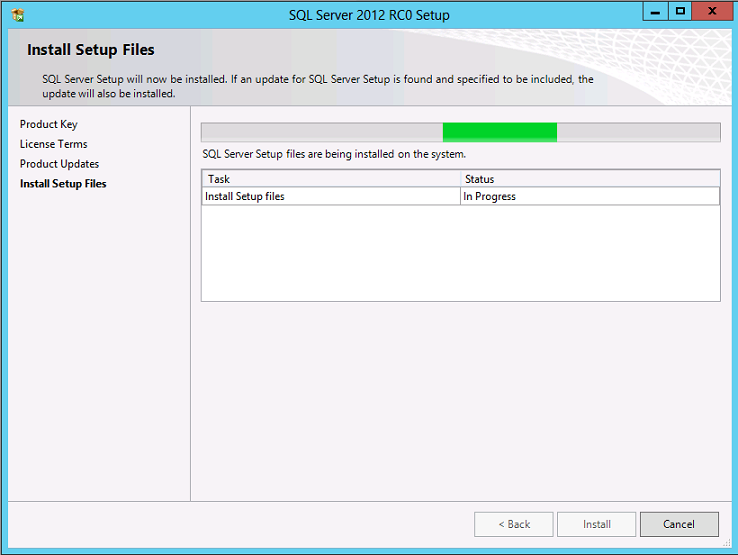
On
the following page, setup files will be installed.
The above screens belong to the second set of Setup
Support Rules.
About the Windows Firewall warning, you can go ahead with the installation of
SQL Server, but when it finishes configure your Windows Firewall to allow SQL
Server access or disable it. Click here to
know how to configure Windows Firewall for SQL Server access.
About the
Microsoft .NET Application Security warning, Setup Support Rules verifies
Internet connectivity and triggers a warning if there is no Internet connection.
The reason to check for Internet connection is "because .NET always tries to
connect to CRL.MICROSOFT.COM on startup to check signature validation.". For
more information click here.
Neither
of these warnings will prevent you from installing SQL
Server.
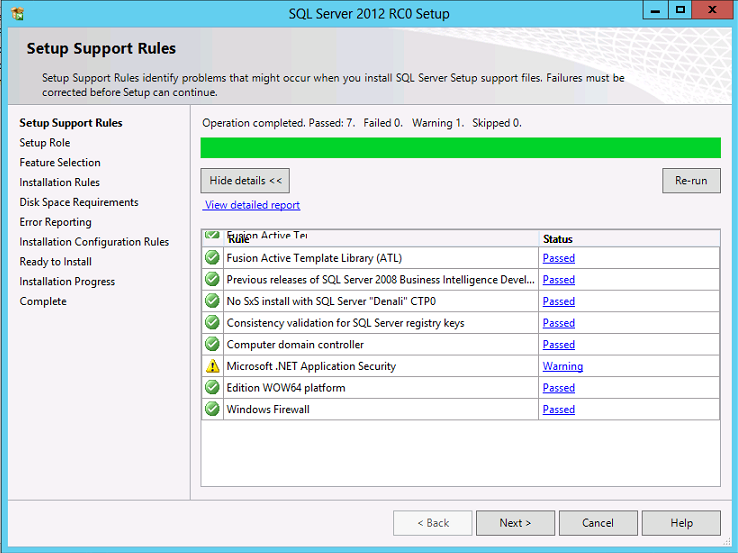
After configuring Windows Firewall, the Windows
Firewall warning will disappear if you click on the "Re-run"
button.
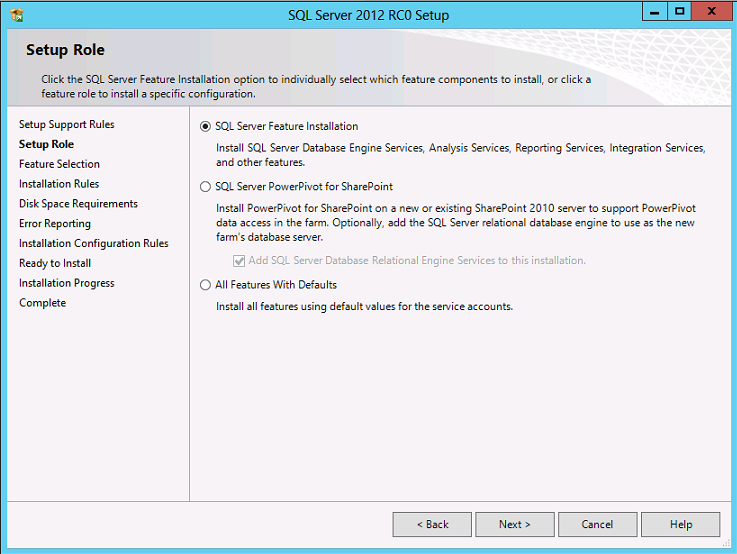
On the SQL Server Setup page shown
above, you can decide to install specific features of SQL Server or decide to
install SQL Server using a setup role. For more information about this page,
please click here.
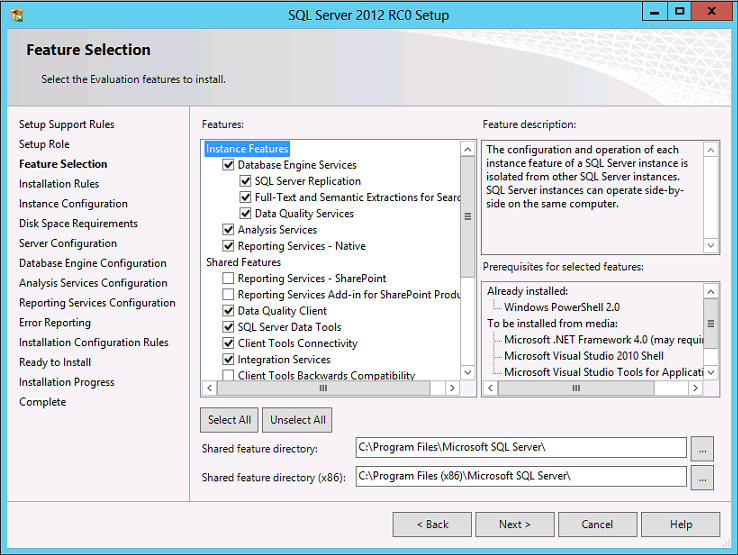
On the Feature Selection page, please select the
features you would like to install. A description of each feature will appear on
the "Feature description" area when you click on a
feature.
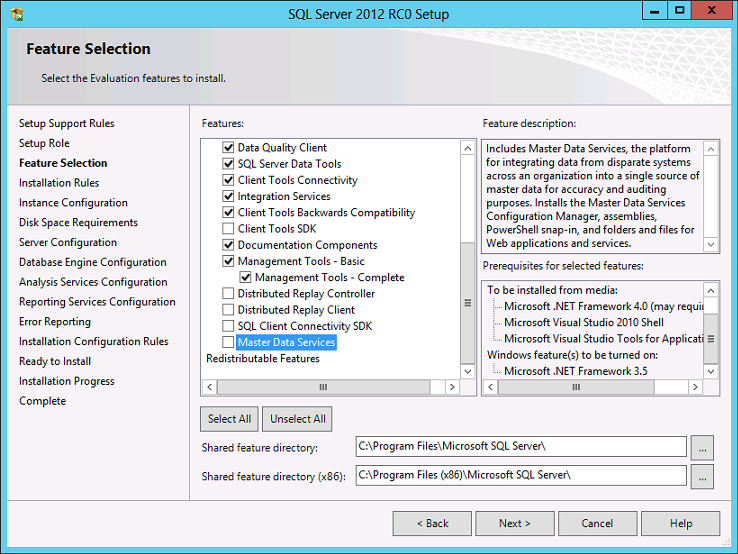
The
"Prior Visual Studio 2010 instances requiring update." rule verifies if Service
Pack 1 for Visual Studio 2010 has been applied"
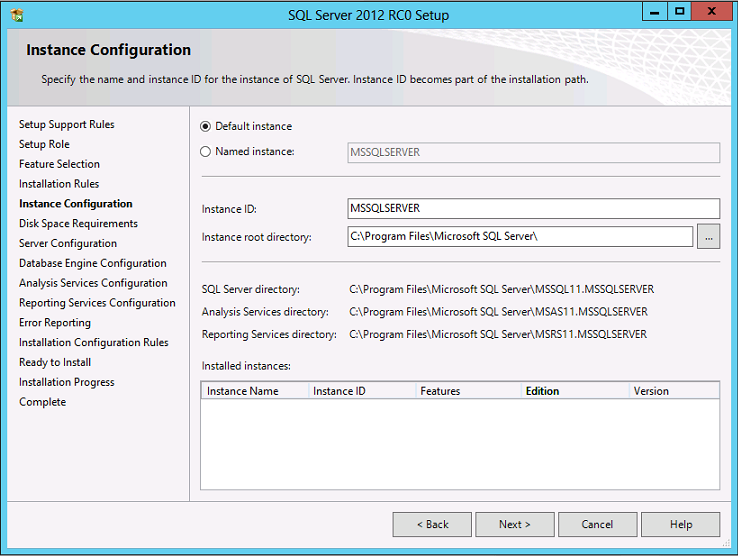
On the
Instance Configuration page, select a default or named instance for your
installation, and select de directory where you want to install de features you
have chosen.
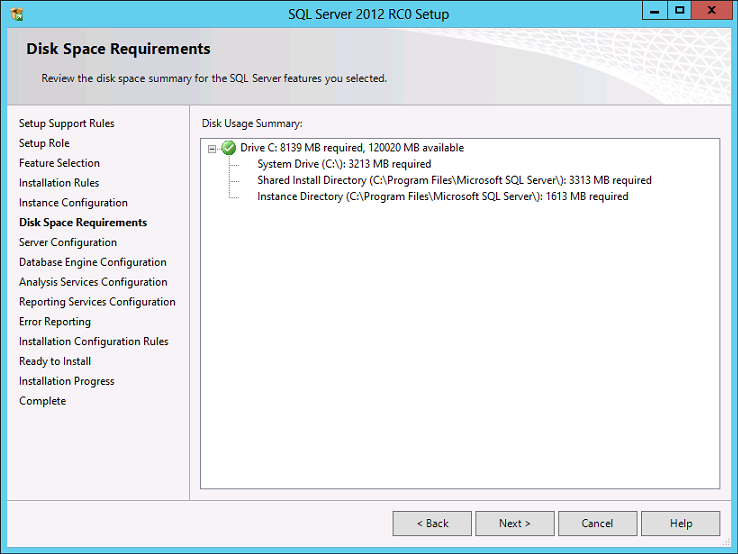
This page is just for the purpose of reviewing disk usage. Click on the
"Next" button to continue setup.
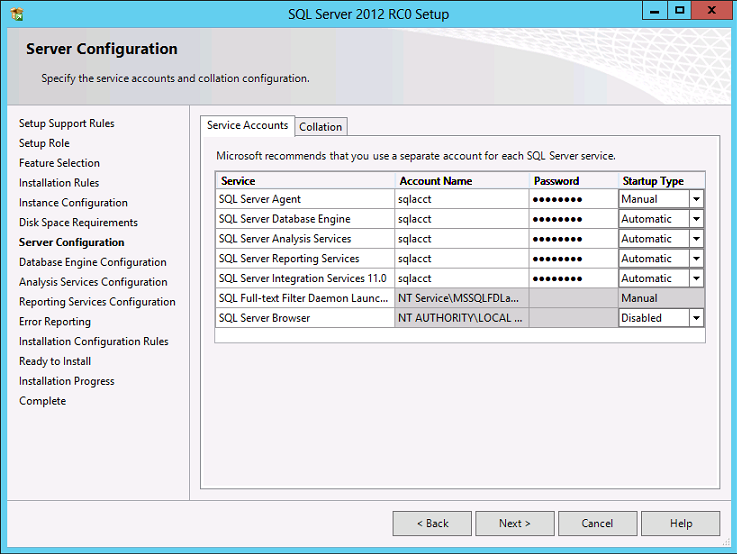
It
is recommended to create a local user or use a domain user account to start
SQLServer services.
If the computer is not part of a domain, use a local
user account without Windows administrator permissions. You can create this
account using Control Panel -> User Accounts.
Use a Domain User
Account if the service must interact with network services or access domain
resources. This account should be pre-created by a domain administration in your
environment.
Whether you create a local user or a domain user account, the password you
use to create the account must be a strong password.
You can also use
built-in accounts (the Network Service account, Local Service, Local System) as
service accounts. However, I would not recommend to use Local Service Account
for SQL Server (MSSQLSERVER). Use Local System if you need a very
high-privileged account. It has extensive privileges on the local
system.
Microsoft recommends you to specify an individual account for
each service. The service accounts used for this configuration must have a
strong password as mentioned above, otherwise you will get the error
"Invalid or missing username or password. To continue, provide valid credentials
for the SQL Server Agent service". A strong password is one that has a
combination of letters in uppercase, lowercase, numbers and special
characters.
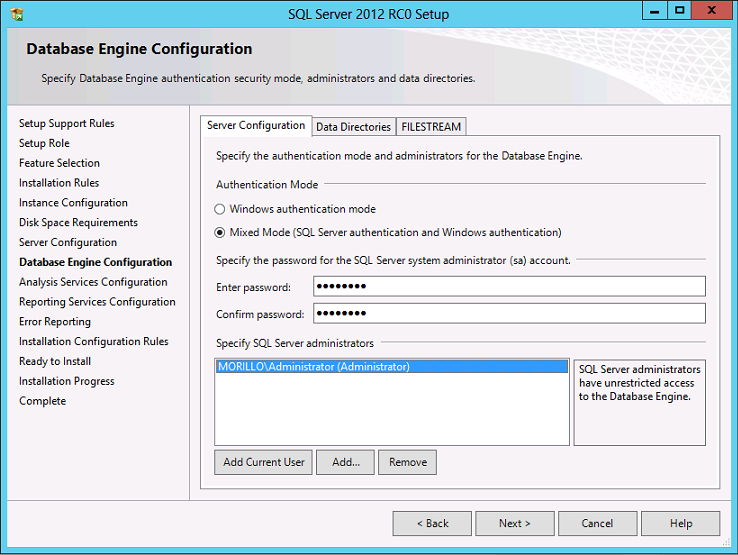
On the
Database Engine Configuration page, choose the authentication mode to use for
your SQL Server installation.
Enter and confirm the password for the (sa)
login when you choose Mixed Mode Authentication.
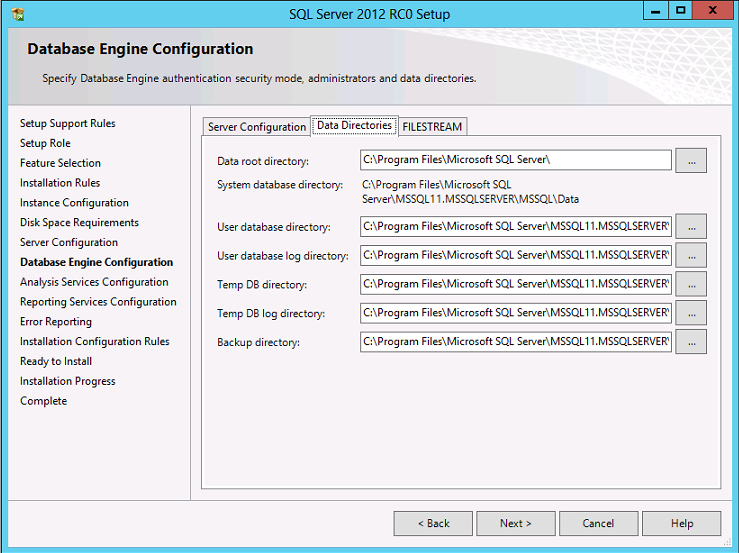
Use the "Data Directories" tab on the "Database Engine Configuration"
page to change the default location for data
directories.
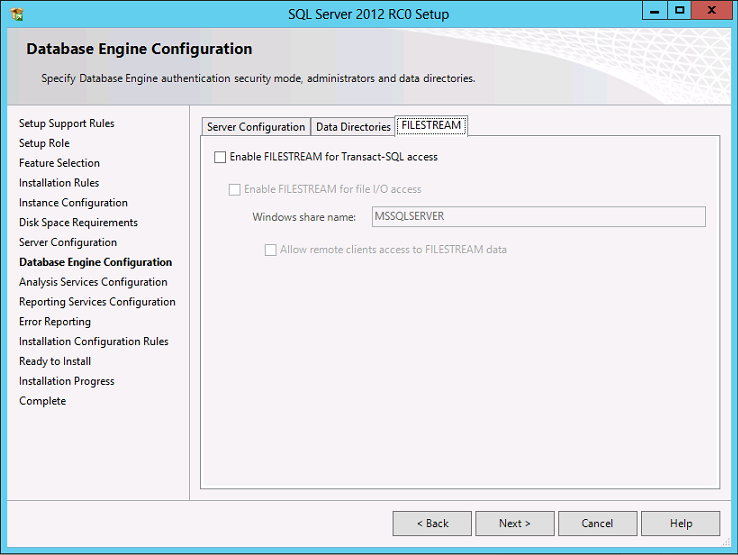
Use
this page to enable FileStream on this instance. To enable it, select "Enable
FILESTREAM for Transact-SQL access".
Select "Enable FILESTREAM for file
I/O streaming access" to enable Win32 streaming access for FileStream.
On
the "Windows share name" text box, to enter the name of the Windows share in
which the FileStream data will be stored.
Select "Allow remote clients to have streaming access to FILESTREAM data" to
allow remote clients to access this FileStream data on this
server.
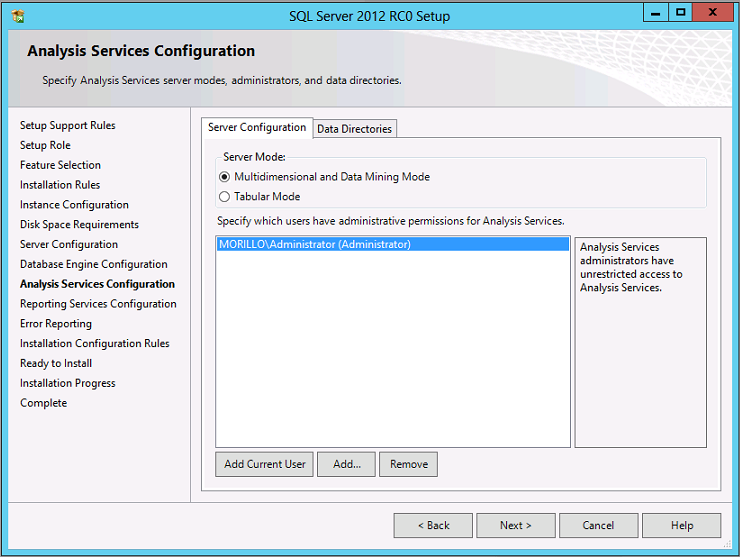
Select
"Install Analysis Services in Multidimensional and Data Mining Mode" to install
Analysis Services with support for online analytical processing databases and
data mining models.
Select "Tabular Mode" to install Analysis Services
with support for tabular models.
Each mode is exclusive of the other.
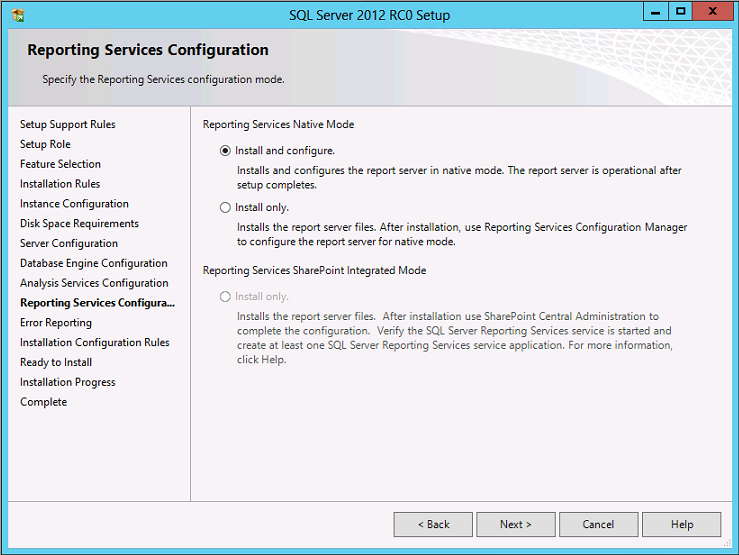
On the Reporting Services Configuration page, choose
to install Reporting Services on Native Mode or SharePoint Integrated
Mode.
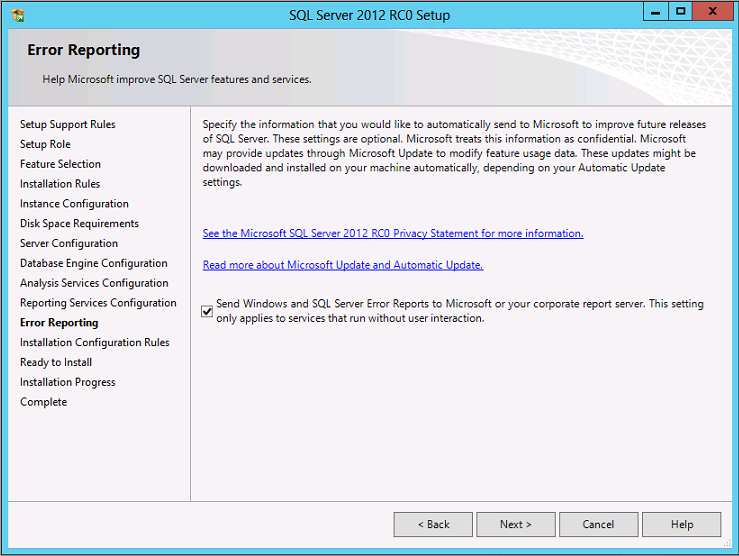
On the Error Reporting page, optionally clear
the check box to disable error reporting.
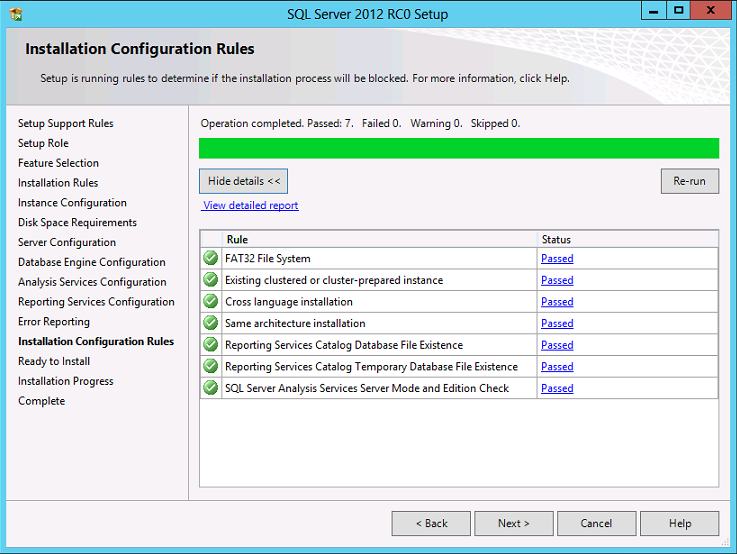
The
above dialog belongs to the Installation Configuration Rules. Setup will be
running these rules to determine if the installation process will be
blocked.

On the Ready to Install page, review the
summary of features and components for your SQL Server installation. To proceed,
click Install.
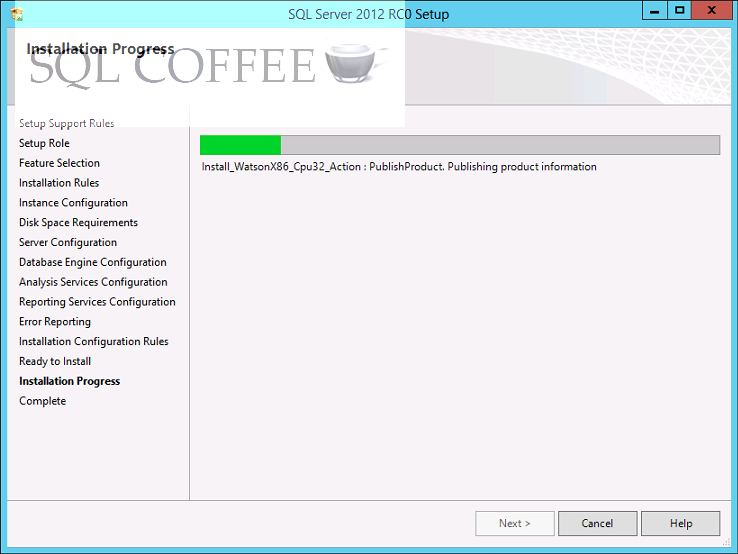
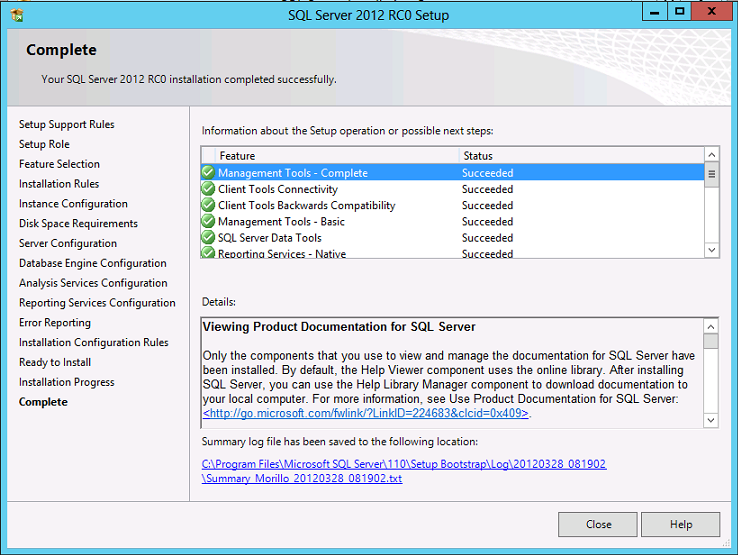
This
installation completed successfully, but if the SQL Server 2012 installation
completed with the "Error installing Microsoft Visual Studio 2010 Shell. Error
1706" error message, please see click here
for a workaround.
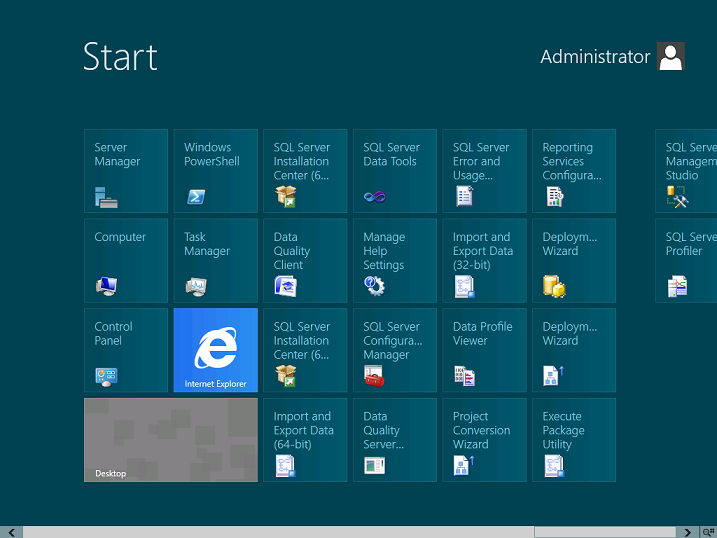
This is how the Start Screen looks on Windows Server
2012 after you install SQL Server 2012.

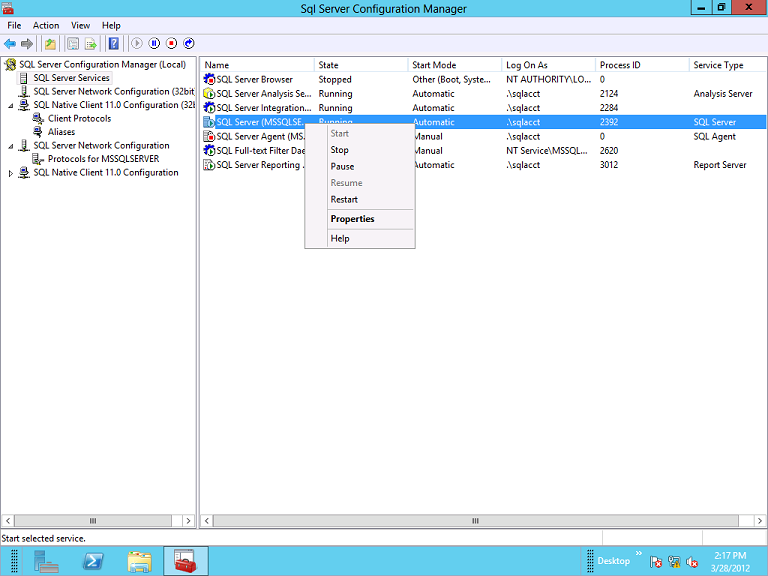
Change the start mode of SQL Server services as you
wish using SQL Server Configuration Manager.
Please enable SQL Server
Browser service if you installed a named instance of SQL
Server.
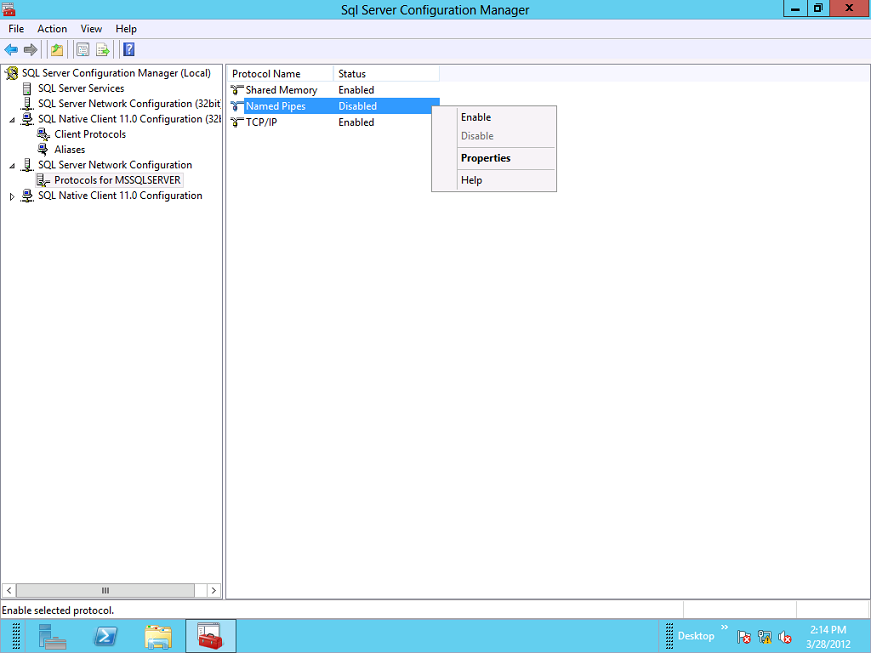
Enable all three protocols. Click here
to know how.
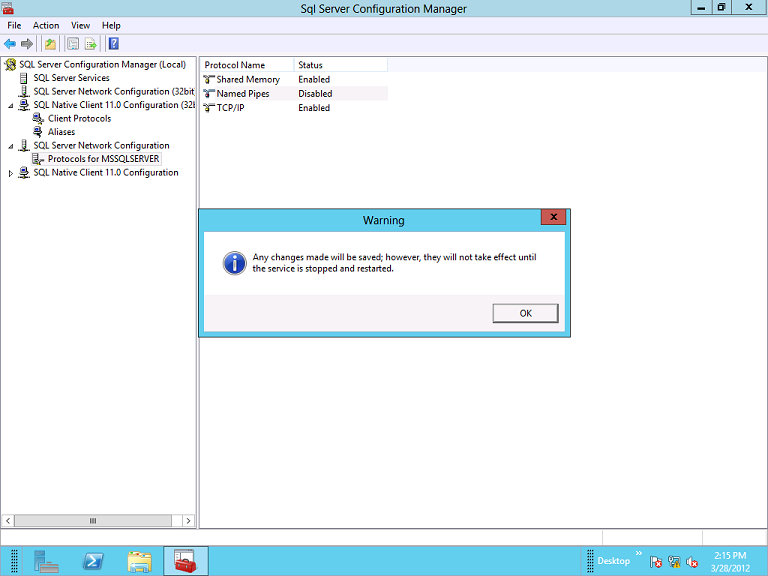
Do not
forget to restart SQL Server service after enabling a new
protocol.
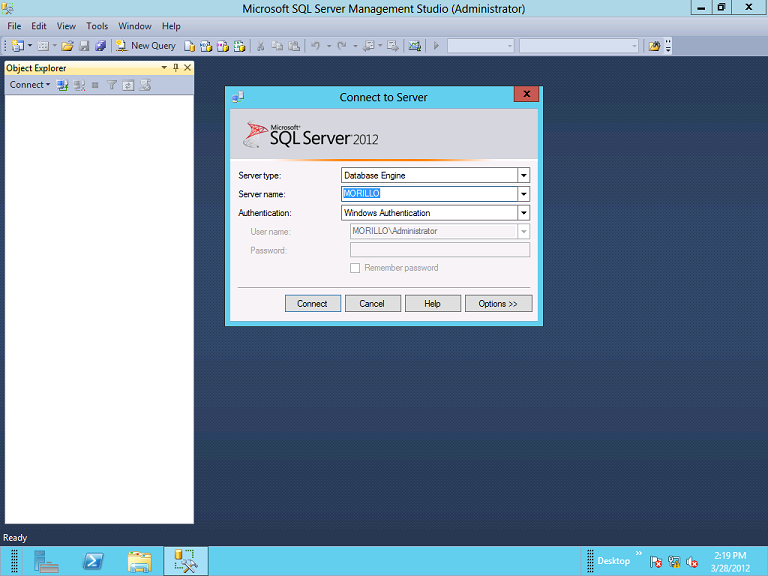
You
are now ready to use SQL Server 2012. Enjoy it!